Monday, October 13, 2014

Desk Maps with Unity Pro and Render Textures


In a previous post we talked about huge desks in unity basic hovering below true game objects pretending to render them on a map. This time we've invested in Unity Pro and are ready to deal with Render Textures.

______________________________________________________________


Major Upsides: 
  • No more candelabra floating above your map in the editor.
  • All districts about the same shape can share a single desk object set

You can either make a new universal desk or take one of the old ones and use it as a base like I did. 
  • Make sure to set it well out of your play-map range to keep it out of the way.
  • The size of this desk doesn't matter. It and all it's objects could be huge or tiny because it's relation to the game map is no longer important.


Now all that's left is creating the individual maps that you can turn on and off as you access the Desk Camera. Each desk can even activate it's own accessories on the Unified desk.

Like So

______________________________________________________________


To Create the Map Textures
  • Assets -> Create -> Render Texture
  • Create a camera and set it above what you want a map of. Orthographic view is great for this
  • Set your new Render Texture to the Camera's Target Texture in the Inspector
  • Set the Render Texture as the texture for the object you want to hold the map (I used a flat cube)
For for large or irregularly shaped districts, there's a second, larger desk. This also lurks out of sight, visible only through activated cameras.


Viola! Now you have an interchangeable map-desks using Render Textures!

______________________________________________________________


All blog posts by UnityGirl are inspired by my work with Brunelleschi: Age of Architects on the Aesop Games team. Check out our Crowd Funding page(s)!


Thursday, October 9, 2014

Draw Pad: Mapping, Proximity and Contours


Recently, the Aesop Games studio has acquired a Wacom Intuos Pen and UnityGirl is in art heaven. Here to share some of the joy and knowledge, we're going to go over the basics of draw pad usage.


______________________________________________________________

Getting Started
Surely if I hold out my hand long enough, it will fill with ink.
First Draw Pad Doodle
Some of the first things I learned were

  • You can totally install the drivers from the web site without having to put the CD Drive back into your computer to finish installation
  • For at least the first day, you'll be using the pen as your new mouse.
  • Don't leave the pen on the tablet, it'll mess up the sensitivity.
  • It CAN survive being fumbled
  • It can handle multiple monitors

______________________________________________________________


Mapping
Actually, one of the coolest things about the draw pad is that it will map to almost anything. Basically, mapping is the relationship between the surface area of the draw pad and the area you want it to be able to draw in. I have two screens, but prefer very small hand strokes to draw, therefore I leave it mapped to span both screens. If you're doing super detail work, or just don't want the pen to leave your work-area, you can map it to a specific small section of the screen.

It also has advanced settings for multiple display use, but I won't post on it until I've played with those more.


______________________________________________________________

Proximity
This is where you use your draw pen for your mouse the whole first day. Perhaps the coolest thing on that first day is realizing that when you hover your pen at-the-ready, the pad can tell. It's all about proximity.

When the tip of the pen is near the pad, the indicator light lights up and your pen takes over the cursor on your screen. I personally felt like a god of wireless control at the time.When you're ready to draw (or click, or drag) just press the tip of the pen to the pad. 

What it Takes Getting Used To
  • The mapping of the draw pad means the location of the pen is absolute, not relative like the mouse.
  • The tip of your pen doesn't "roll" like that of a ball point
  • Pressure only applies as much as the program and your settings allow - don't push too hard.
______________________________________________________________


Contours
Now where did I leave my eyebrows?The two major revolutions from mouse-based computer art to draw-pad based are pressure and control. Like most artists who started analog, I find the mouse lacking in finesse for the fine arch of a girl's forearm..... I mean UI elements. However, even for mouse-wizards, the draw pad pen offers the feature of Pressure.

Either way, the extra detail and control offered with the draw pad setup are remarkable. In a matter of days my image work has improved from Frankenstein-ian clip-art creations to pretty nice original art if I do say so myself.

The next time we talk about Draw Pads, we'll combine it with Inkscape and the sculpting tool.

______________________________________________________________


All blog posts by UnityGirl are inspired by my work with Brunelleschi: Age of Architects on the Aesop Games team. Check out our Crowd Funding page(s)!

Wednesday, October 1, 2014

Unity Script: Building a Small Village with JS / UnityScript


______________________________________________________________

This here's an introduction to instantiating onto multiple lots at the beginning of your scene (or script). We'll start with some good ol' fashioned JS. You'll recognize this structure as a stretched version of BuildHere which we used to instantiate just the one building on the one lot. This is the way to do it if you want to avoid an Array and For-Loop situation. Good for small stuff but not great for generating large towns.
______________________________________________________________

Basically we're just multiplying everything by six.


______________________________________________________________

The Script

#pragma strict

var building : GameObject;

var lot1 : GameObject;
var lot2 : GameObject;
var lot3 : GameObject;
var lot4 : GameObject;
var lot5 : GameObject;
var lot6 : GameObject;

var buildHere : GameObject;

var resourceLoadString1 : String;
var resourceLoadString2 : String;
var resourceLoadString3 : String;
var resourceLoadString4 : String;
var resourceLoadString5 : String;
var resourceLoadString6 : String;

var thisPos1 : Vector3 = new Vector3();
var thisPos2 : Vector3 = new Vector3();
var thisPos3 : Vector3 = new Vector3();
var thisPos4 : Vector3 = new Vector3();
var thisPos5 : Vector3 = new Vector3();
var thisPos6 : Vector3 = new Vector3();

var thisRot1 : Quaternion = new Quaternion();
var thisRot2 : Quaternion = new Quaternion();
var thisRot3 : Quaternion = new Quaternion();
var thisRot4 : Quaternion = new Quaternion();
var thisRot5 : Quaternion = new Quaternion();
var thisRot6 : Quaternion = new Quaternion();


function Start () {
//sets your building's position to the same coordinates as your lot
thisPos1 = lot1.transform.position;
thisPos2 = lot2.transform.position;
thisPos3 = lot3.transform.position;
thisPos4 = lot4.transform.position;
thisPos5 = lot5.transform.position;
thisPos6 = lot6.transform.position;
//this raises your building up a bit above the lot so you don't get z-fighting flickers
thisPos1[1] = thisPos1[1] + 0.45f;
thisPos2[1] = thisPos2[1] + 0.45f;
thisPos3[1] = thisPos3[1] + 0.45f;
thisPos4[1] = thisPos4[1] + 0.45f;
thisPos5[1] = thisPos5[1] + 0.45f;
thisPos6[1] = thisPos6[1] + 0.45f;

thisRot1 = lot1.transform.rotation;
thisRot2 = lot2.transform.rotation;
thisRot3 = lot3.transform.rotation;
thisRot4 = lot4.transform.rotation;
thisRot5 = lot5.transform.rotation;
thisRot6 = lot6.transform.rotation;

//this string should be your path through your Resources folder
resourceLoadString1 = "MoveConst/Construction Frame 1";
resourceLoadString2 = "MoveConst/Construction Frame 2";
resourceLoadString3 = "MoveConst/Construction Frame 3";
resourceLoadString4 = "MoveConst/Construction Frame 4";
resourceLoadString5 = "MoveConst/Construction Frame 5";
resourceLoadString6 = "MoveConst/Construction Frame 6";

buildHere = Instantiate(Resources.Load(resourceLoadString1), thisPos1, thisRot1) as GameObject;
buildHere = Instantiate(Resources.Load(resourceLoadString2), thisPos2, thisRot2) as GameObject;
buildHere = Instantiate(Resources.Load(resourceLoadString3), thisPos3, thisRot3) as GameObject;
buildHere = Instantiate(Resources.Load(resourceLoadString4), thisPos4, thisRot4) as GameObject;
buildHere = Instantiate(Resources.Load(resourceLoadString5), thisPos5, thisRot5) as GameObject;
buildHere = Instantiate(Resources.Load(resourceLoadString6), thisPos6, thisRot6) as GameObject;
}


______________________________________________________________

Reminders

  • Make sure to set your Resource.Load() paths correctly and 
  • Assign your Lots in the Inspector if you don't GameObject.Find() them.
__________________________________________________________


All blog posts by UnityGirl are inspired by my work with Brunelleschi: Age of Architects on the Aesop Games team. Check out our Crowd Funding page(s)!


Monday, September 29, 2014

Unity Tip : Dense Grass on Really Big Terrains


The challenge of making an open-world city is how very big the map needs to be. There are several ways to do this but I chose to go with about 4 Really Big terrains.
______________________________________________________________

Problem:
Now I can't get my grass close enough together to look realistic

Grass Density 1


Why?
  • Ground cover in Unity terrains is spaced via square terrain units
    • it can only have so many instances of a ground cover per square
  • Every terrain has the same number of square units

Therefore : When you make a very large terrain, your units and thus ground cover get spread out

______________________________________________________________

Solution:
The terrain can be tricked by using multiple types of ground cover, or copies of your favorite
  • Spread your favored grass/bush/flower as thickly as you can
  • Create a second grass/bush/flower and spread it over the same area. Twice as dense!
Grass Density 2


Now just repeat the process until you're satisfied. I like to mix two types and colors of grass for realism, but here's three for the nature enthusiasts.


______________________________________________________________


All blog posts by UnityGirl are inspired by my work with Brunelleschi: Age of Architects on the Aesop Games team. Check out our Crowd Funding page(s)!


Tuesday, September 23, 2014

Draw Pad: Inkscape Sculpts Your Sketches


Finding Inkscape was great enough. It increased the speed and quality of my graphics work significantly. Combining the detail provided by the draw pad with the Sculpting function of Inkscape makes creating almost any image possible.
______________________________________________________________


Inkscape Sculpt Tool
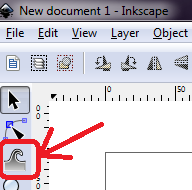
This is a revolutionary tool for free image software. You can find it third from the top of your left vertical toolbar. It looks like a little gray wave/finger
How To Use It
The basic function is very simple. 
Now just grab an edge and pull!
______________________________________________________________

What It Makes Possible
You don't have to have a draw pad to make this tool work for you. Even starting with standard circles and squares, you can make unique shapes with simple mouse control. 

Check out this piece of concept art for Aesop's future Primian Genesis game, all made with the sculpting tool.
______________________________________________________________

Improving Draw Pad Sketches
The sculpt tool, along with Inkscape's intuitive interface, are great for working with draw pad sketches. You can smooth, lengthen, combine, and shape your lines. You can add shading, paint bucket fills, and hand-craft shadows.

For our example, we'll start with quick Draw-Pad sketch. The first sketch was done in about 5 minutes. For the second image, no lines were added or moved and only the sculpt tool (at displayed settings) was used. The edit took about 30 minutes, playing a lot with line shaping options.

Note where it's thickened in some places and thinned in others. Lengthened, smoothed, curved, shortened, joined with other lines or shaped into multiple connected lines as with the neck.
______________________________________________________________


All blog posts by UnityGirl are inspired by my work with Brunelleschi: Age of Architects on the Aesop Games team. Check out our Crowd Funding page(s)!

Sunday, September 21, 2014

Unity Tip: Easy 2D Drag with Touch

This is a quick and incredibly simple way to touch and drag gameobjects in 2D unity space.
______________________________________________________________

The Script!


For Copying

using UnityEngine;
using System.Collections;

public class TouchDrag : MonoBehaviour {

// Update is called once per frame
public float speed = 0.1F;
      void Update() {
            if (Input.touchCount > 0 && Input.GetTouch(0).phase == TouchPhase.Moved) {
                 Vector2 touchDeltaPosition = Input.GetTouch(0).deltaPosition;
                 transform.Translate(touchDeltaPosition.x * speed, touchDeltaPosition.y * speed, 0);
            }
      }
}

     
______________________________________________________________

"Why Post this Tiny Script?"


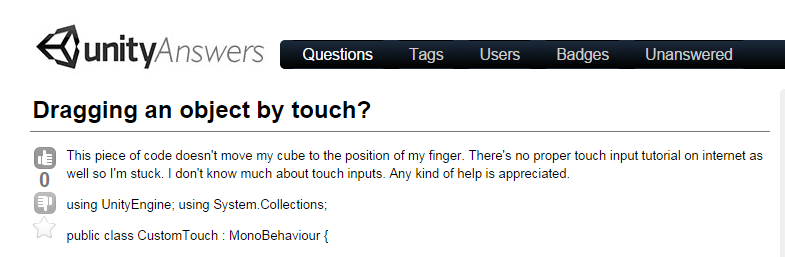
Simple. A lot of people have asked. Not me personally, but while researching in the forums I found tons of questions about how to drag with touch. Every game has special requirements of its code, but I found a lot of the answers that, while functional, were really complicated. Many didn't have answers at all. Thus, when I discovered that I had a totally simple and functional drag script: Sharing! :D


______________________________________________________________

"How Should I Use It For My Game?"


  • Experiment
    • I suggest testing out the speed variable, I haven't yet
  • Bumpers
    • These will keep your object from flying off the screen at flicking-speeds
    • 2D colliders on object and bumper-object
    • I suggest a 2D Rigidbody set to "is kinematic" on the bumper
  • It's Your Game
    • Do what you want. If it's really cool, blog about it!


______________________________________________________________
"Where did you find it?"
In the documentation. That's right. It's right there. It's the first example under Input.GetTouch. The only problem? It's not labeled at all! I didn't actually even know I had a great touch-drag script until I realized I WAS touch-dragging an old gameobject that still had this TEST script thrown on as a beginner's try at touch!

______________________________________________________________

Serendipity for All! :)

My happy accident is now everybody's happy accident! Let us rejoice and move things around with our fingers!

______________________________________________________________


All blog posts by UnityGirl are inspired by my work with Brunelleschi: Age of Architects on the Aesop Games team. Check out our Crowd Funding page(s)!


Tuesday, September 16, 2014

Inkscape: Faster, Better UI Elements


I'm UnityGirl with a special report on why Inkscape kicks ass for quick UI elements.

______________________________________________________________

It's Free
I'm sure I don't have to stress to the indie community the value of free dev programs. I'm thrilled about another great program I don't have to buy or subscribe to.


It Goes Faster

Whether it's concept art or creating your final polished UI assets, you have a few options.

  • Paint, the Gimp, Paint and the Gimp, Something Not Free, Things on Mac and Linux I don't know about, and Inkscape

Working with Paint, the Gimp, or even both together (my old standby) isn't bad, but Inkscape is faster.

What Makes Inkscape Faster?
  • Intuitive layering of every artistic stroke and shape you make
  • Easy border and transparency settings
  • The sheer number of shape options!
  • Helps re-arrange and alter layers quickly for multiple versions of an image (ex: matching buttons)
______________________________________________________________


It just looks better

With the ease and options of Inkscape, any time you put into polishing your images will show. Here's some personal examples.


This is an example of a loading bar I made mostly in the Gimp. As you can see, it's got a nice metal texture around the edge and a cloth texture in the center. It's rounded at the edges and has a consistent border. On the other hand, it looks flat. It's clearly just two textures stuck together.


Alternately, here's a radial loading dial made in Inkscape. See the simulated dirt? The smooth lines? The mild illusion of depth?

This dial looks better AND was faster and more fun to make than it's bar-shaped older brother. I've found Inkscape a better program for original artwork.


______________________________________________________________


All blog posts by UnityGirl are inspired by my work with Brunelleschi: Age of Architects on the Aesop Games team. Check out our Crowd Funding page(s)!